
i just finished a lap quilt for my sister for Christmas (Our family get together was today, so done just in the nick of time. Here's a picture:
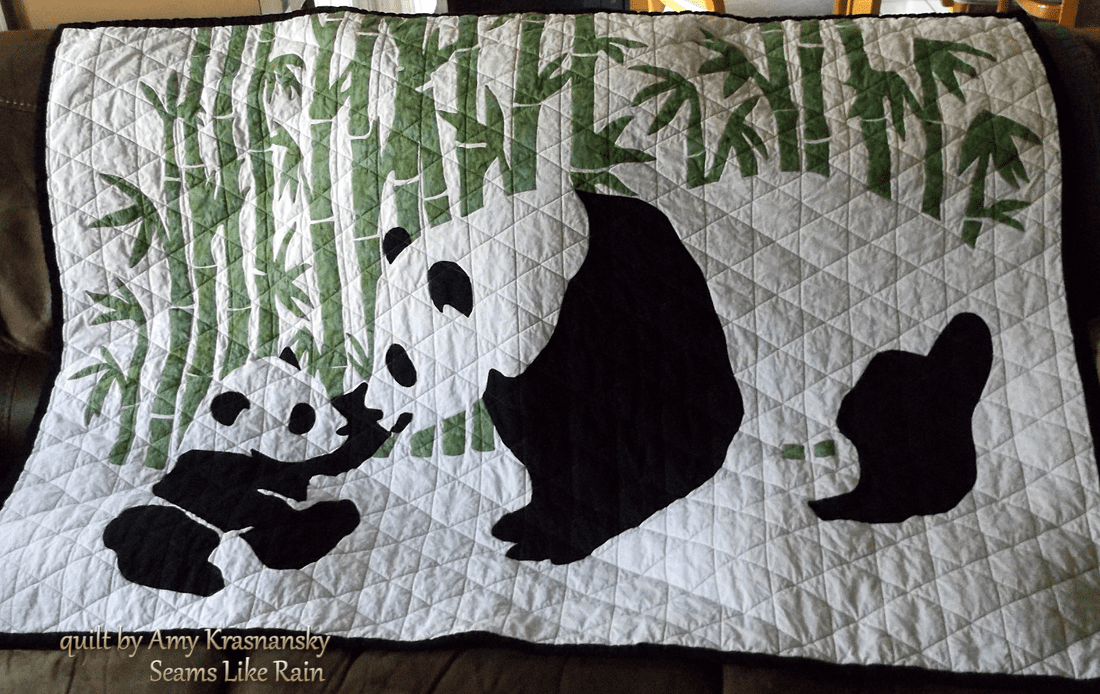
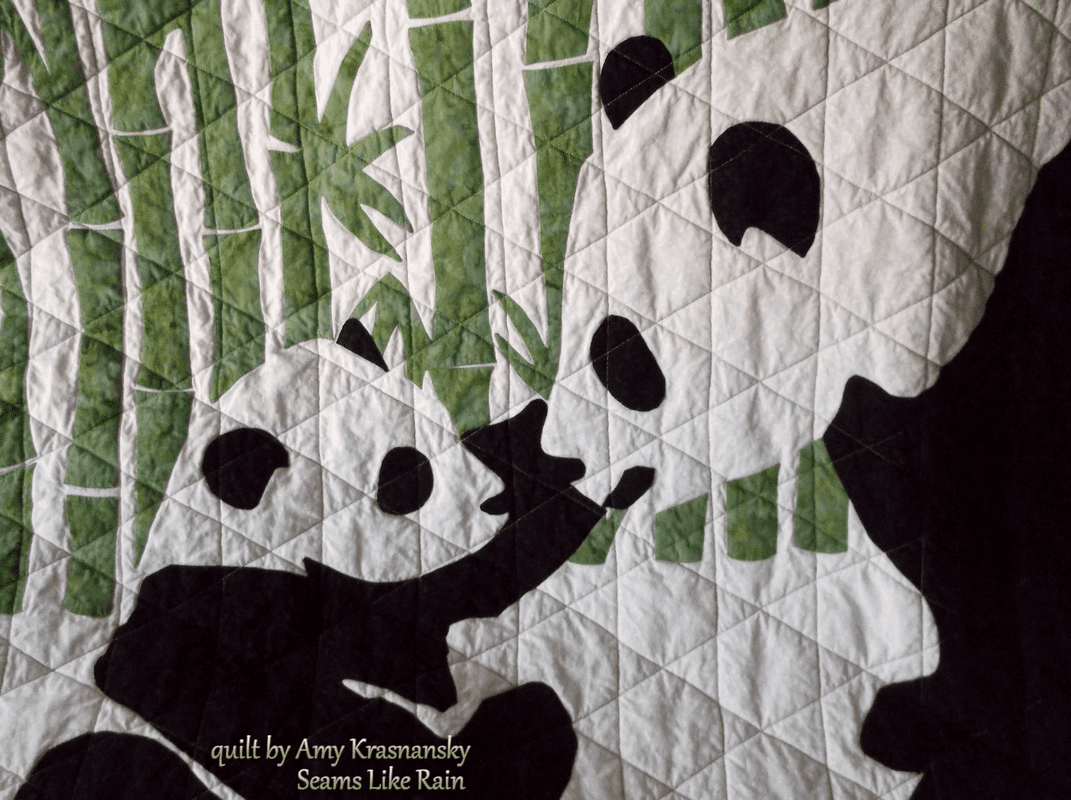
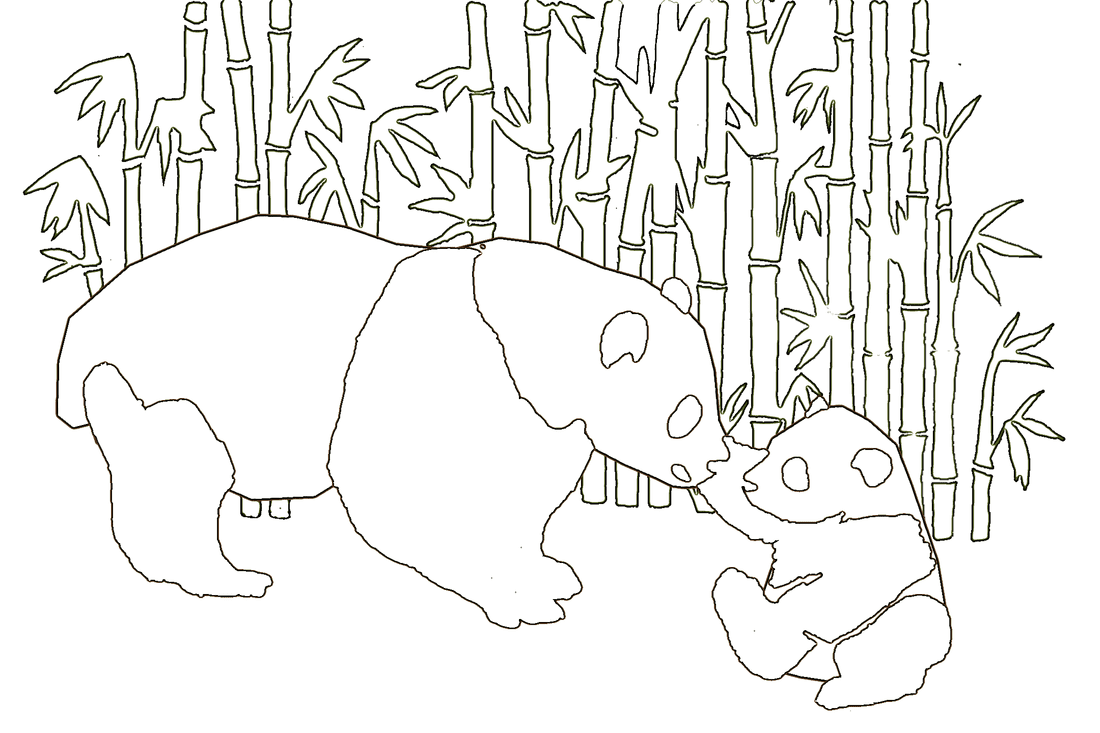
My sewing machine's foot pedal broke part way through, so I had to use the Start/Stop button for the rest of the quilt. It was challenging on some of the applique pieces, a lot of starting and stopping on the curves. I decided to do straight lines for the quilting so that I wouldn't have to start and stop as much. I think it turned out cute - hard to miss with a baby animal involved.
Here's the pattern, reversed so that it can be traced onto freezer paper.
|
|  | ||||
Tutorial for my process (sorry, I didn't take pictures, but feel free to ask questions):
1. Print the pattern out full size on multiple sheets of paper (the quilt I made was 40" x 60") and tape all the pieces together. See the end of the page for instructions on downloading and printing.
2. Trace all of the bamboo pieces and the black parts of the bears onto freezer paper. Since I used a white background fabric, I did not make pieces for the white parts of the bears, but instead let them flow into the background. I suggest numbering all the pieces on the pattern and the corresponding freezer paper pieces so that it will be easier to place the pieces later.
3. Cut out all the freezer paper pieces.
4. Iron freezer paper pieces onto the back of fabric leaving space between them for approximately quarter inch seam allowance around each piece.
5. Cut out the fabric pieces with the seam allowance around them. Clip the concave curves and corners.
6. Iron the allowance down over the freezer paper using a mini iron and starch to make it stay down.
7. Flip the full size pattern over and trace the lines with a black marker. Now you can use it as a placement guide for your applique pieces. Lay the white background fabric on top.
8. Position all of the applique pieces on the background fabric. One at a time, peel the freezer paper off and glue the piece down using temporary fabric glue.
9. Stitch around all the pieces using a narrow zigzag stitch and clear monofilament thread.
Instructions for printing the .pdf file:
Instructions for printing the .png file with Paint (comes with Windows):
1. Print the pattern out full size on multiple sheets of paper (the quilt I made was 40" x 60") and tape all the pieces together. See the end of the page for instructions on downloading and printing.
2. Trace all of the bamboo pieces and the black parts of the bears onto freezer paper. Since I used a white background fabric, I did not make pieces for the white parts of the bears, but instead let them flow into the background. I suggest numbering all the pieces on the pattern and the corresponding freezer paper pieces so that it will be easier to place the pieces later.
3. Cut out all the freezer paper pieces.
4. Iron freezer paper pieces onto the back of fabric leaving space between them for approximately quarter inch seam allowance around each piece.
5. Cut out the fabric pieces with the seam allowance around them. Clip the concave curves and corners.
6. Iron the allowance down over the freezer paper using a mini iron and starch to make it stay down.
7. Flip the full size pattern over and trace the lines with a black marker. Now you can use it as a placement guide for your applique pieces. Lay the white background fabric on top.
8. Position all of the applique pieces on the background fabric. One at a time, peel the freezer paper off and glue the piece down using temporary fabric glue.
9. Stitch around all the pieces using a narrow zigzag stitch and clear monofilament thread.
Instructions for printing the .pdf file:
- If you don't have Adobe Acrobat Reader, you will have to get the free download for that.
- Click on the Download File link under pandas.pdf above.
- When the picture appears in your browser, click on the Download icon on the line above the picture and select a place to save the file. Click the Save button.
- Find the pandas.pdf file on your computer (where you saved it), and double click on it to open it in Adobe Reader.
- In Adobe Reader, Select File, then Print.
- On the Print window, under Page Sizing & Handling, select Poster.
- Make sure the Tile Scale is 100% (assuming you want it to be 40" x 60". If you want a different size, scale it to whatever size you want) DON'T PRESS ENTER UNTIL YOU ARE READY TO PRINT
- Select Landscape.
- Click the Print button.
Instructions for printing the .png file with Paint (comes with Windows):
- Click on Download File under pandas.png.
- When the picture comes up in your browser, right click on it and select Save Image As and then save it somewhere on your computer.
- Find the pandas.png file on your computer (where you saved it). Right click on it and select Open With Paint.
- In Paint, select File, then hover on Print, then Page Setup.
- On the Page Setup, select Landscape.
- Set all the margins to 0.12.
- Select Adjust to 100% Size (this is where you can resize it if you don't want it to be 40" x 60").
- Click OK.
- Select File, then hover on Print, then Print Preview.
- If it looks right, click on the Print button.


 RSS Feed
